Neural networks are getting smaller. Much smaller. At the same time, embedded devices, such as mobile phones, are becoming more powerful and energy-efficient. This fuels an exciting trend in machine learning, so called tinyML or embedded ML.
tinyML is a fast growing field of machine learning algorithms that are capable of performing on-device sensor analytics at extremely low power, hence enabling a vast range of new smart applications.
A few weeks ago, PyTorch, a popular machine and deep learning framework, released their PyTorch Mobile library, which enables end-to-end deployment of machine learning algorithms on mobile devices. This blog summarizes how we used PyTorch Mobile to create an intelligent camera app on iOS.
“Hello World” of AI Cameras
Let’s start by following the PyTorch Mobile tutorial and get the PyTorch demo application running. The demo contains a camera app that runs a quantized computer vision model to classify images coming from device’s rear-facing camera in real time.
- Start by cloning the tutorial’s code repository.
git clone https://github.com/pytorch/ios-demo-app
2. Install TorchVision, a PyTorch package containing datasets and popular models for computer vision.
pip install torchvision
3. Once you have TorchVision installed, navigate to the PyTorchDemo folder and run
pod install
to integrate the PyTorch C++ library with your project.
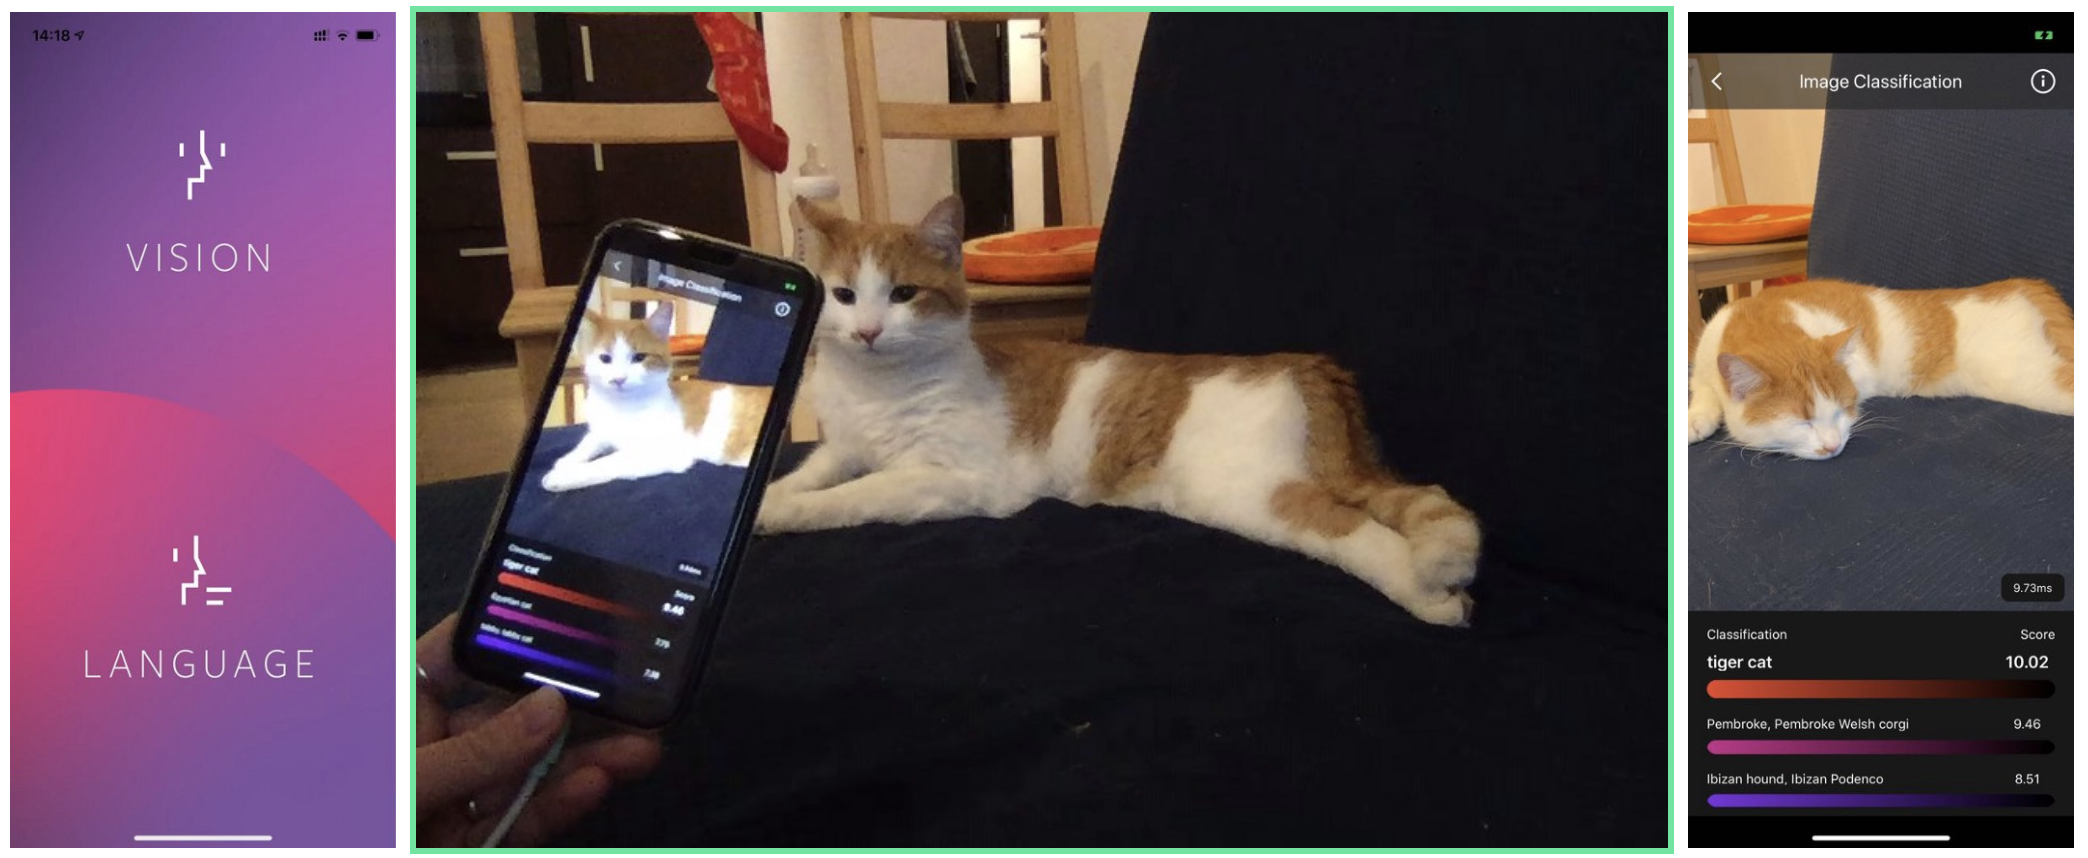
Now it’s time to open the PyTorchDemo.xcworkspacein XCode, connect your iPhone, select it as a simulator and launch the project (cmd + R). If everything works well, you should see a welcome screen (below on the left).
Select Visionto start using your AI-powered camera. You can point your camera at an object and get a real-time classification based on a pre-trained MobileNet model.

Left: Welcome screen of the demo app. Middle and right: Vision app running.
Camera with Custom AI
Now that we have a camera app working with a pre-trained model for image classification, the next question becomes:
How can we classify input images using custom labels?
As a running example, let’s say I’d like the camera to classify my cat Plamek and our neighbours cat called Pixel (who frequently comes over to steal our cat food!).
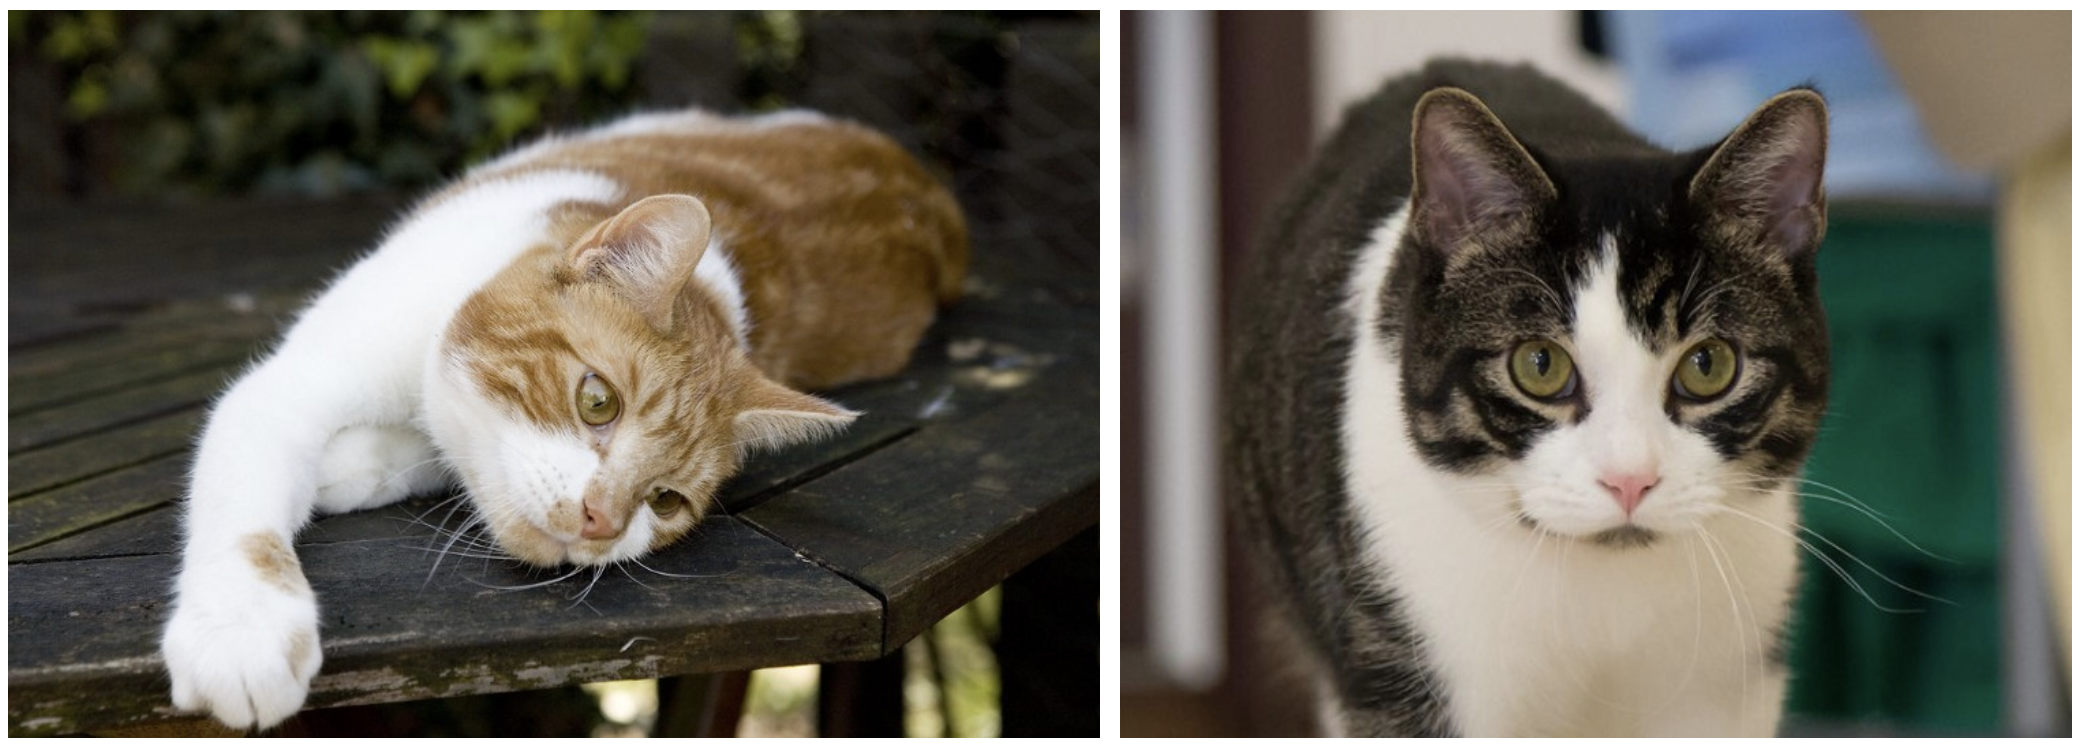
Cat Plamek (left) and neighbour’s cat Pixel (right).
We tackle the problem using transfer learning. Transfer learning enables taking a pre-trained model and adjusting it to your own images and labels. Since we don’t have thousands of cat images, we want to fine-tune a pre-trained neural network rather than to train it from scratch.
You can find our transfer learning script transfer_learning_cats.ipynbin the project repo. Start by cloning the code repository.
git clone https://github.com/ucl-casa-ce/pytorch-transfer-learning/
Below we will walk you through the main steps.
Collect training data
First, we collect sample images of Plamek and Pixel. Since we do not have many images of them, instead we scrape images of similar cats from Google.
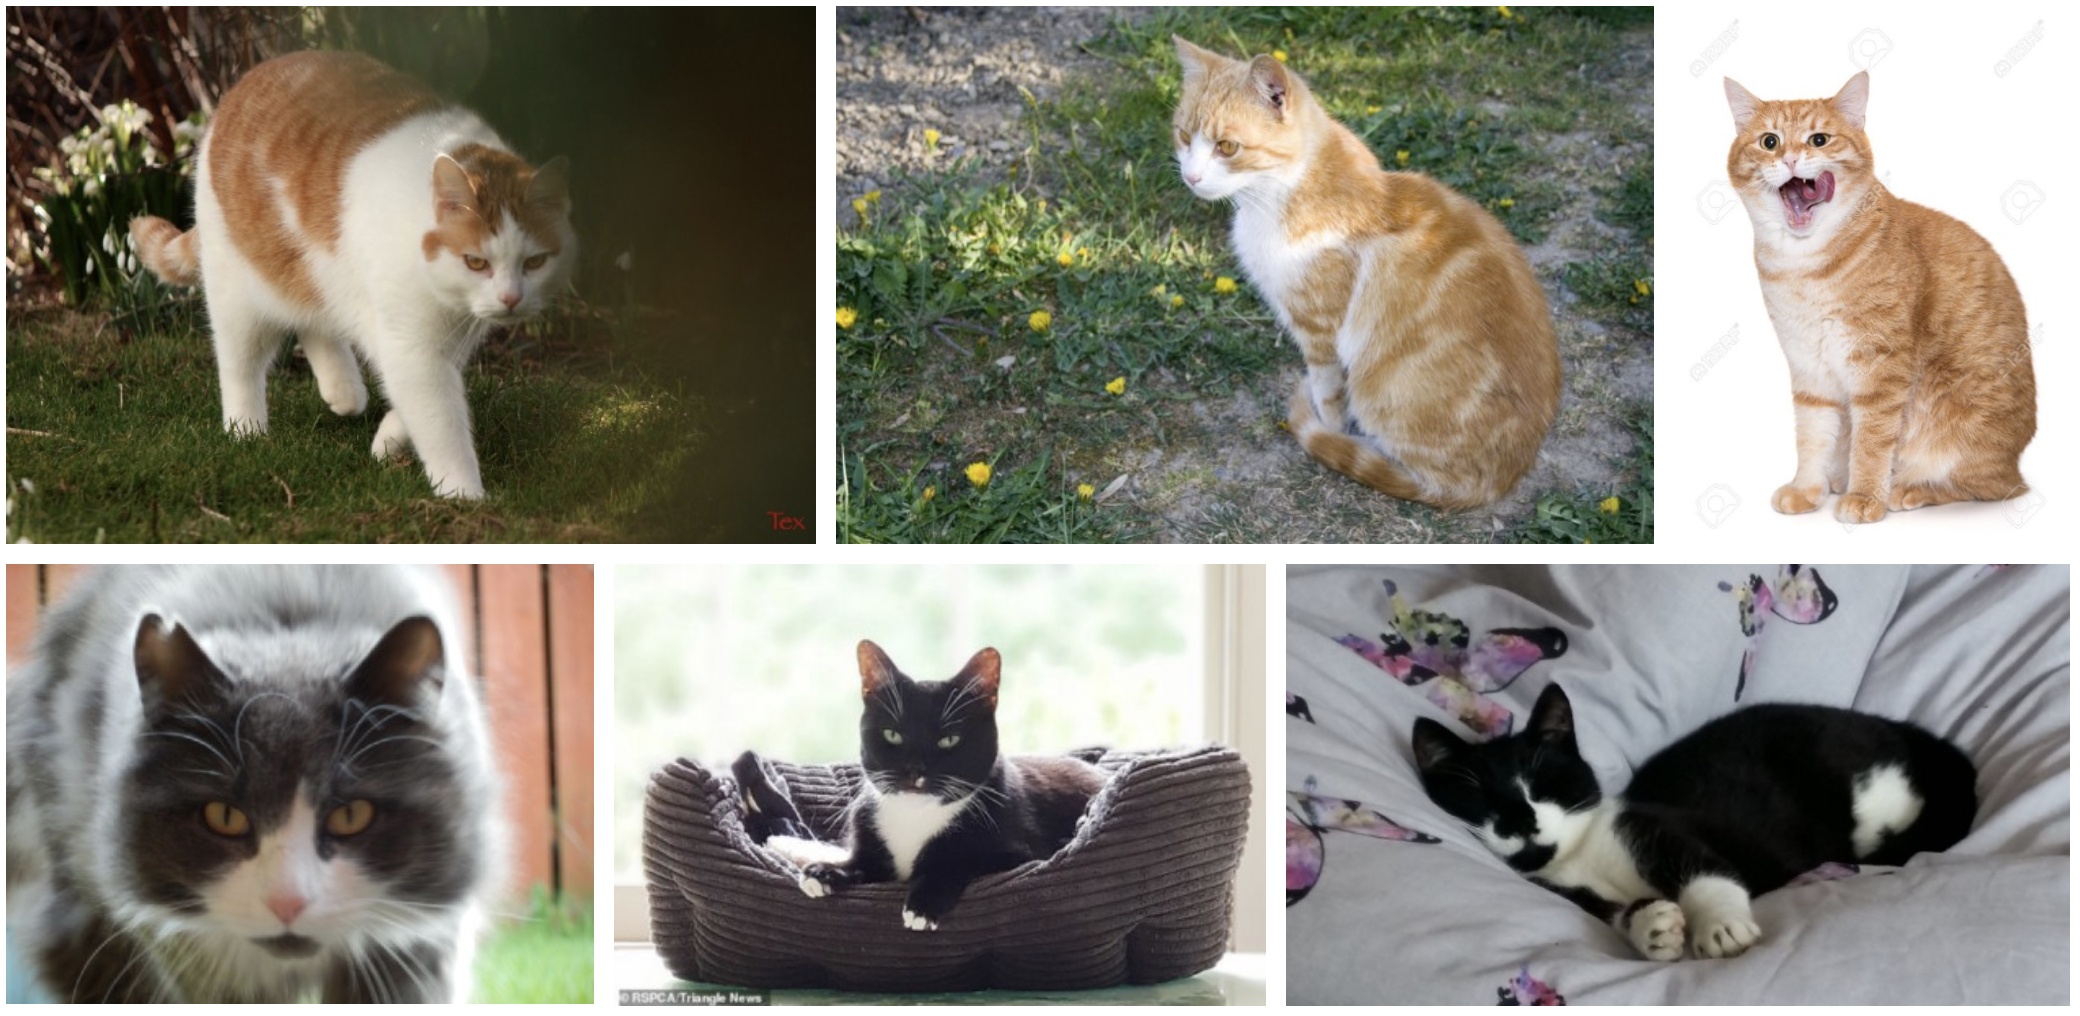
Images of cats similar to Plamek (top) and Pixel (bottom).
We clean and then split the data into training and validation sets with 140 images of each class for training and 60 for validation. You can find the final dataset here.
Fine-tune computer vision model
Take an image classification model Resnet18 pre-trained on a very large dataset (Imagenet which contains 1.2 million images with 1,000 categories) and use it as an initialization for our cat classifier.
model_ft = models.resnet18(pretrained=True)
Modify the output layer of Resnet from 1,000 to 2 classes corresponding to Plamek and Pixel.
num_ftrs = model_ft.fc.in_features
model_ft.fc = nn.Linear(num_ftrs, 2)
Then train the classifier using our cat data.
model_ft = train_model(model_ft, criterion, optimizer_ft, exp_lr_scheduler, num_epochs=25)
After training, the model should successfully classify Plamek and Pixel.
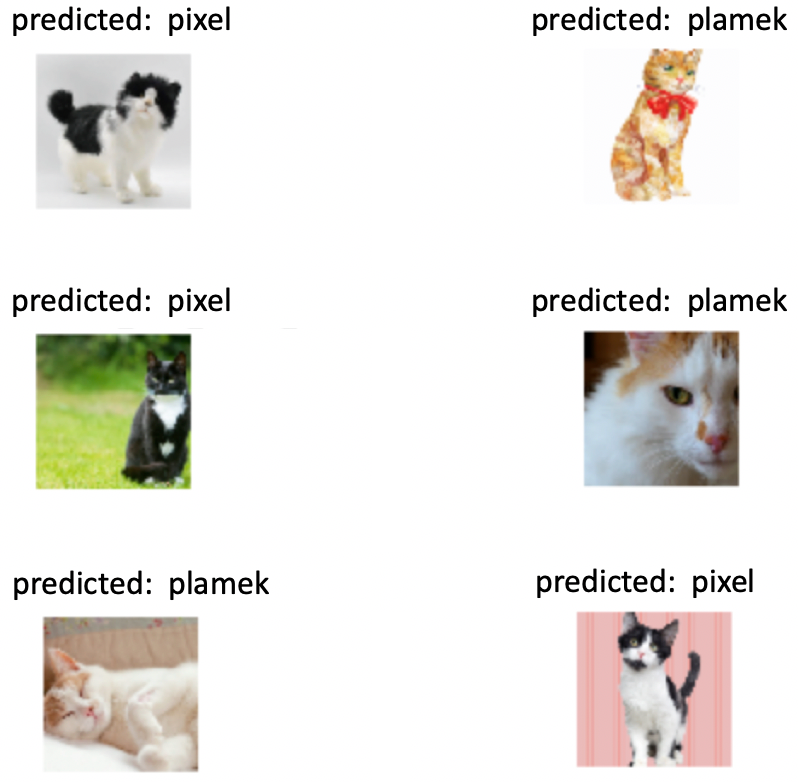
Sample model predictions after transfer learning.
Finally, save the model.
torch.save(model_ft.state_dict(), 'model.pt')
Deploy the custom model on iOS
You are ready to deploy the custom AI model on iOS. Let’s navigate to the project folder and run trace_model.py. The script contains the code of tracing and saving a torchscript model so that it can be run on mobile devices.
python trace_model.py
If everything works well, you should have your model model_traced.pt generated in the project folder. Now copy the model file to our PyTorchDemo application folder PyTorchDemo/ImageClassification/modeland rename it to model.ptto replace the original model file.
Finally, update words.txtin the same folder to contain only the two labels:
Plamek
Pixel
Voilà!
Now it’s time to test your cat detection camera. Open again the PyTorchDemo.xcworkspacein XCode, connect your iPhone, select it as a simulator and launch the project (cmd + R). If everything works well, you should see the same Vision app as before, but now running your own cat classification model.
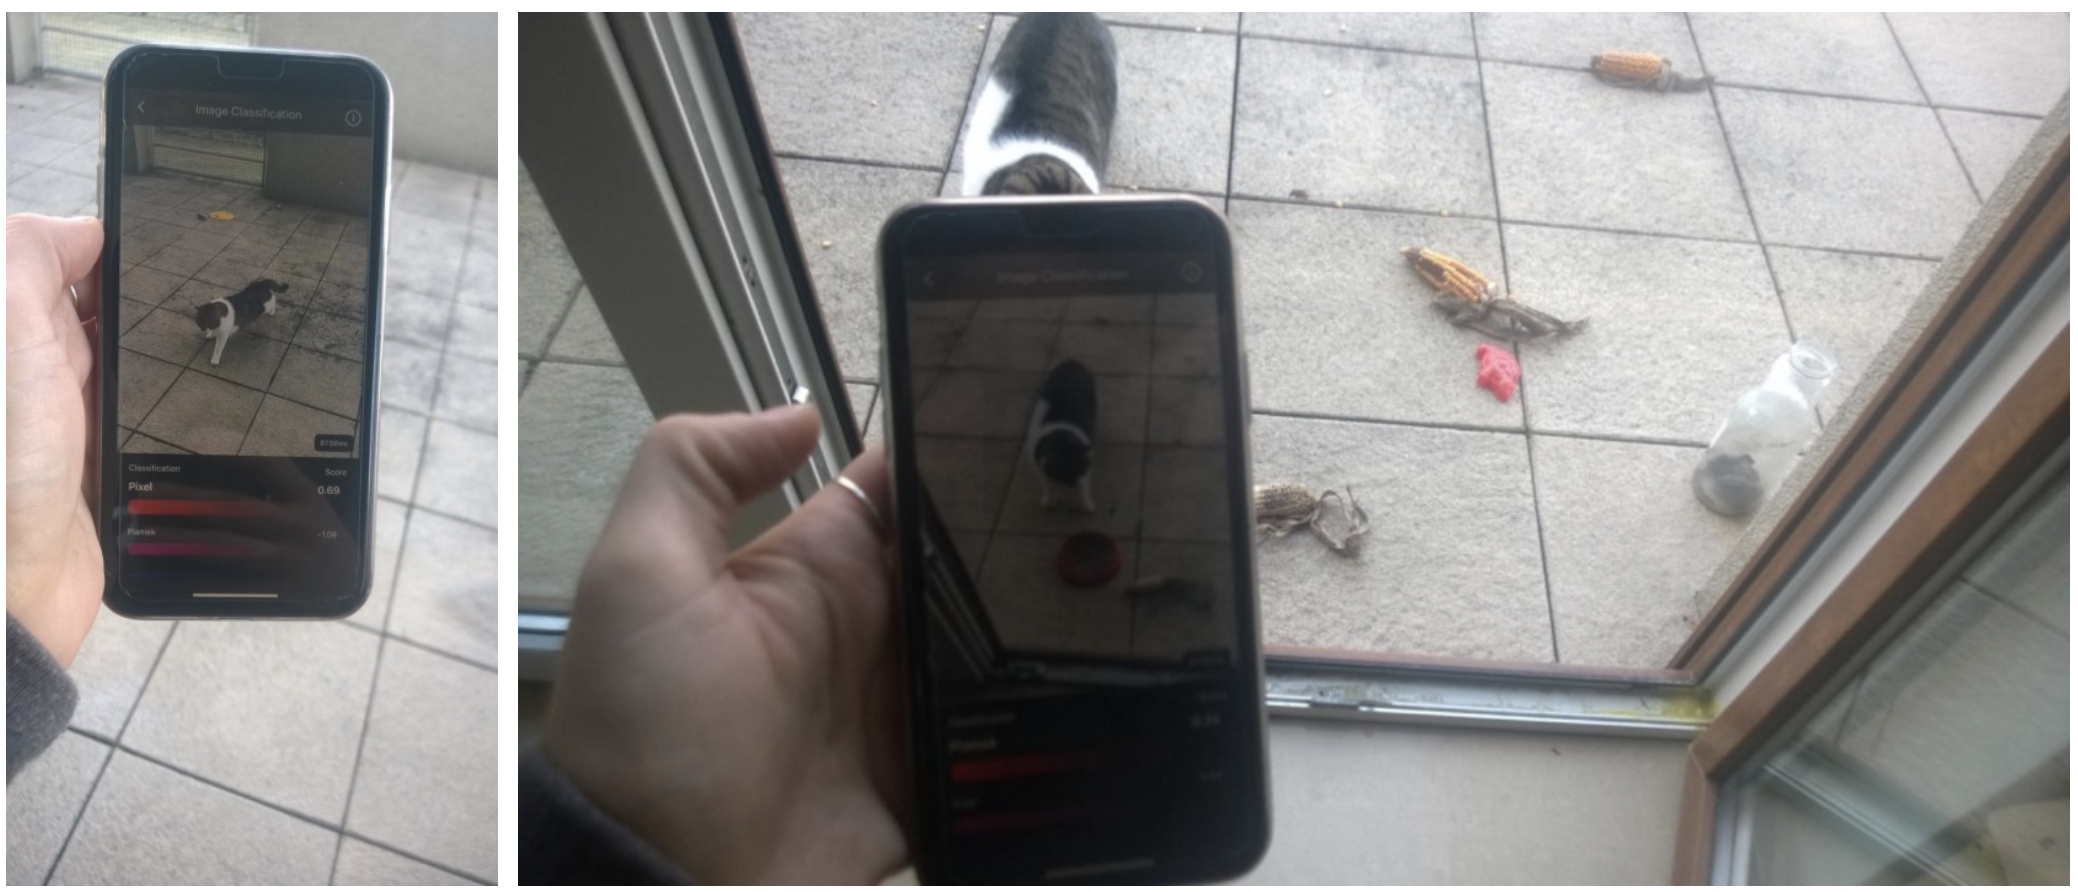
Our custom AI camera correctly identifies Pixel.
As you can see, the custom AI camera can correctly classify Pixel and Plamek using the rear-facing camera in the iOS.
The project repo with the custom AI model can be found here.